Creamy Vanilla Pudding: Perfect Homemade Dessert Recipe
🍽️ Craving a luxurious dessert that feels elegant yet incredibly simple? Creamy vanilla pudding is the answer to your dessert dreams—silky, rich, and absolutely irresistible!
There's nothing quite like the pure comfort of creamy vanilla pudding. This classic dessert combines simple ingredients with proven techniques to create a velvety, indulgent treat that transports you to a world of pure bliss. Whether you're seeking a sophisticated ending to dinner or a nostalgic comfort food, homemade creamy vanilla pudding delivers every single time with its luxurious texture and authentic vanilla flavor.
What makes homemade creamy vanilla pudding special is its superior texture compared to instant mixes. By using fresh cream, real vanilla extract, and proper cooking techniques, you achieve a silky consistency that coats your palate beautifully. Furthermore, this recipe requires only basic pantry staples and takes just 25 minutes from start to finish. Additionally, you can customize the vanilla intensity and sweetness level to match your preferences perfectly.
📋 Table of Contents
▼
- 🌟 Why Homemade Creamy Vanilla Pudding Surpasses Store-Bought Alternatives
- ⚖️ Advantages and Considerations of Creamy Vanilla Pudding
- 🎯 Expert Tips for Perfect Creamy Vanilla Pudding Every Time
- 📚 Flavor Variations and Creative Customizations for Creamy Vanilla Pudding
- 💡 Storage, Make-Ahead Tips, and Serving Creamy Vanilla Pudding
- 📖 Recipe Card
- ❓ FAQ
🌟 Why Homemade Creamy Vanilla Pudding Surpasses Store-Bought Alternatives
Understanding the science behind creamy vanilla pudding helps you appreciate why homemade versions taste infinitely better. The combination of proper technique and quality ingredients creates an unmatched dessert experience.
The Science of Silky Texture in Creamy Vanilla Pudding
The secret to achieving that signature silky texture in creamy vanilla pudding lies in the cornstarch and egg yolk combination. Cornstarch gelatinizes when heated, creating a smooth thickening agent that doesn't require flour. Meanwhile, egg yolks provide richness and help create an emulsion. Consequently, the result is a pudding with perfect consistency—not too thin, not too thick. For instance, many instant puddings use artificial thickeners and stabilizers that create an unpleasant mouthfeel compared to this authentic version.
The Importance of Proper Tempering Technique
Tempering is a crucial step when making creamy vanilla pudding that many home cooks overlook. This technique involves slowly adding hot liquid to eggs while whisking constantly, which prevents the eggs from scrambling. Therefore, you achieve a smooth, creamy pudding without any undesirable graininess. Additionally, this method ensures food safety by gently heating the eggs to a safe temperature without causing curdling.
- ✓ Cornstarch creates smooth, natural thickening without flour
- ✓ Egg yolks add richness and improve mouthfeel
- ✓ Proper tempering prevents scrambling and curdling
- ✓ Real vanilla extract provides authentic flavor complexity
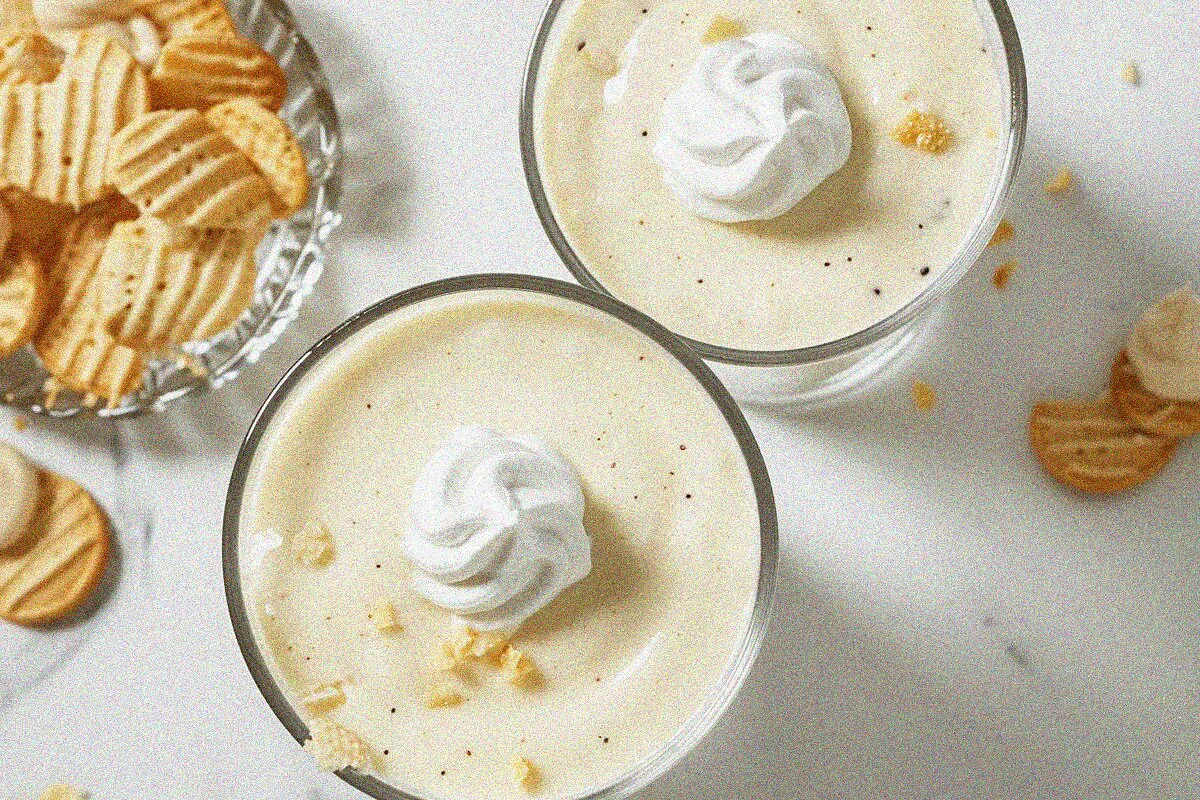
Silky creamy vanilla pudding showcasing its luxurious texture and professional presentation
⚖️ Advantages and Considerations of Creamy Vanilla Pudding
Like any dessert recipe, creamy vanilla pudding has distinct advantages and factors to consider. Understanding both sides helps you determine if this recipe fits your needs and preferences perfectly.
Making an Informed Decision About Your Dessert
Creamy vanilla pudding offers numerous benefits for home cooks seeking an elegant yet achievable dessert. However, there are also specific considerations worth understanding. This comprehensive overview helps you decide whether this recipe aligns with your cooking style and dietary requirements.
✓ Advantages
- ✓ Elegant dessert that impresses guests without requiring advanced skills
- ✓ Uses simple, affordable ingredients available at any grocery store
- ✓ Ready in just 25 minutes including chilling time
- ✓ Can be made dairy-free with coconut milk and dairy-free cream
- ✓ Stores beautifully in refrigerator for up to 4 days
- ✓ Versatile base for various toppings and flavor variations
- ✓ Naturally gluten-free without any substitutions
- ✓ Perfect for meal prep and entertaining multiple guests
✗ Disadvantages
- ✗ Requires careful attention during cooking to prevent curdling
- ✗ Contains raw eggs if not properly tempered to safe temperature
- ✗ Not suitable for those with egg allergies without substitutions
- ✗ Requires straining for completely smooth texture
- ✗ Contains dairy products unless using alternatives
- ✗ Sensitive to overcooking which can create grainy texture
- ✗ Requires chilling time before serving
- ✗ More time-intensive than instant pudding mixes
🎯 Expert Tips for Perfect Creamy Vanilla Pudding Every Time
Master these professional techniques to ensure your creamy vanilla pudding turns out absolutely perfect. These expert strategies are the difference between good pudding and restaurant-quality dessert.
Temperature Control and Ingredient Preparation
Temperature management is absolutely critical when making creamy vanilla pudding. Therefore, use a reliable thermometer to monitor heat levels carefully. Specifically, heat your milk and cream until they're steaming but not boiling—around 180°F. Meanwhile, ensure all ingredients are at room temperature before starting. This consistency helps ingredients blend smoothly without temperature shock.
Mastering the Tempering Process for Silky Results
The tempering step separates amateur pudding from professional-quality creamy vanilla pudding. Consequently, take your time during this crucial step. Whisk constantly while slowly drizzling hot milk into your egg mixture. Furthermore, this gradual process prevents scrambling and ensures a silky final texture. In fact, rushing this step is the most common reason home cooks end up with grainy pudding.
- ✓ Heat milk to steaming, not boiling for best results
- ✓ Whisk eggs and sugar until pale and thick
- ✓ Temper eggs slowly while whisking constantly
- ✓ Strain through fine mesh for completely smooth texture
- ✓ Use quality vanilla extract, not imitation
📚 Flavor Variations and Creative Customizations for Creamy Vanilla Pudding
While classic creamy vanilla pudding is delicious on its own, numerous variations allow you to customize this dessert. Let's explore exciting flavor combinations and creative adaptations.
Elevating Creamy Vanilla Pudding with Complementary Flavors
You can easily customize creamy vanilla pudding by incorporating complementary flavors that enhance rather than overpower. For example, add a pinch of nutmeg or cardamom for warmth and sophistication. Additionally, bourbon vanilla extract provides deeper complexity than regular vanilla. Moreover, a touch of almond extract creates subtle nuttiness. These additions elevate your pudding from simple to spectacular while maintaining its essential character.
Topping Ideas and Serving Suggestions for Creamy Vanilla Pudding
The presentation of creamy vanilla pudding matters as much as the pudding itself. Therefore, consider elegant toppings like fresh berries, candied violets, or crushed amaretti cookies. Furthermore, whipped cream infused with vanilla provides luxurious contrast. Additionally, you might layer creamy vanilla pudding with fresh fruit or granola for texture variation. For a sophisticated presentation, serve in elegant glass bowls or vintage coupes.
- ✓ Add bourbon vanilla for sophisticated depth
- ✓ Infuse with cardamom or nutmeg for warmth
- ✓ Top with fresh berries for color and freshness
- ✓ Layer with Coconut Rice Pudding: Creamy Tropical Dessert Recipe for contrast
- ✓ Serve with vanilla wafers or shortbread cookies

Quality ingredients are essential for creating authentic creamy vanilla pudding
💡 Storage, Make-Ahead Tips, and Serving Creamy Vanilla Pudding
Planning ahead is essential for stress-free entertaining. Fortunately, creamy vanilla pudding is incredibly make-ahead friendly. Therefore, you can prepare it days in advance without compromising quality.
Proper Storage Methods for Maximum Freshness
Store your finished creamy vanilla pudding in an airtight container at room temperature for up to 4 days. Specifically, cover the surface directly with plastic wrap to prevent a skin from forming. Additionally, refrigerate if your kitchen is warm. For longer storage, you can freeze creamy vanilla pudding for up to 2 months, though the texture may become slightly grainy upon thawing. Therefore, freezing works best for pudding you'll use in other recipes rather than serving as-is.
Make-Ahead Strategies for Entertaining
Making creamy vanilla pudding a day or two ahead actually improves the dessert by allowing flavors to develop and mature. Consequently, you can prepare it completely and refrigerate until serving time. Furthermore, this approach eliminates last-minute stress when hosting dinner parties. In fact, many professional chefs prepare creamy vanilla pudding the day before for optimal flavor development and texture.
- ✓ Cover pudding surface with plastic wrap to prevent skin
- ✓ Store in airtight container in refrigerator
- ✓ Prepare 1-2 days ahead for best flavor development
- ✓ Freeze for up to 2 months if needed
- ✓ Add toppings just before serving for best appearance
📖 Recipe Card
🥘 Ingredients
- 2 cups all-purpose flour
- 1 cup granulated sugar
- 3 large eggs
- 1/2 cup unsalted butter, softened
- 2 tsp vanilla extract
- 2 tsp baking powder
- 1/2 tsp salt
- 3/4 cup whole milk
👨🍳 Instructions
- Preheat your oven to 350°F (175°C). Grease and flour a 9-inch round cake pan.
- In a medium bowl, whisk together flour, baking powder, and salt. Set aside.
- In a large bowl, cream together butter and sugar until light and fluffy, about 3-4 minutes.
- Beat in eggs one at a time, then add vanilla extract.
- Alternate adding flour mixture and milk, beginning and ending with flour mixture.
- Pour batter into prepared pan and smooth the top.
- Bake for 30-35 minutes until a toothpick inserted in center comes out clean.
- Cool in pan for 10 minutes, then turn out onto a wire rack to cool completely.
📊 Nutrition Information
❓ Frequently Asked Questions
Yes, you can substitute eggs with cornstarch or tapioca starch for a completely egg-free creamy vanilla pudding. However, the texture will be slightly different—less rich but still smooth and creamy. Use 4-5 tablespoons of cornstarch instead of eggs and cornstarch combined. The pudding will still taste delicious and satisfy your dessert cravings.
Grainy texture in creamy vanilla pudding typically results from overcooking or improper tempering. If you heat the mixture too quickly or fail to whisk constantly during tempering, eggs can scramble. Additionally, cooking above 180°F can cause graininess. To prevent this, use a thermometer, whisk constantly during tempering, and cook gently over medium heat. Straining the finished pudding through fine mesh also helps achieve silky smoothness.
Absolutely! Replace regular milk and cream with unsweetened coconut milk, oat milk, or cashew cream. The texture and flavor will be slightly different but equally delicious. Use a 1:1 ratio for substitution. Note that dairy-free versions may require slightly more cornstarch for proper thickening. Explore our Creamy Desserts: Master the Art of Silky, Indulgent Homemade Treats for more dairy-free options.
Properly stored creamy vanilla pudding lasts 3-4 days in the refrigerator. Store it in an airtight container with plastic wrap directly touching the surface to prevent skin formation. The pudding remains safe to eat for this duration, though flavor quality peaks within the first 2 days. Always check for any off odors or mold before consuming.
While instant pudding mixes offer convenience, homemade creamy vanilla pudding provides superior flavor and texture. Instant mixes contain artificial thickeners, stabilizers, and flavorings that don’t compare to fresh ingredients. However, if time is extremely limited, instant pudding is an acceptable shortcut. For best results, enhance instant pudding with real vanilla extract and fresh whipped cream.
Use pure vanilla extract, never imitation. Pure vanilla contains real vanilla bean flavor compounds that create authentic taste. Bourbon vanilla, Madagascar vanilla, and Tahitian vanilla each offer unique flavor profiles. For creamy vanilla pudding, Madagascar vanilla provides the classic flavor most people expect. Avoid imitation vanilla, which contains vanillin and tastes artificial and chemical.
🎉 Final Thoughts
Creamy vanilla pudding represents more than just a dessert—it's a testament to how simple ingredients and proper technique create extraordinary results. Whether you're entertaining guests or indulging in personal comfort, this homemade pudding delivers sophistication and satisfaction. The silky texture, authentic vanilla flavor, and elegant presentation make every spoonful memorable.
The beauty of mastering creamy vanilla pudding lies in its versatility and reliability. Once you understand the fundamental techniques, you can customize flavors, experiment with toppings, and create variations that suit your preferences. Furthermore, this recipe serves as a foundation for numerous other desserts, from pie fillings to trifles. Therefore, learning to make perfect creamy vanilla pudding expands your entire dessert repertoire. Additionally, you might explore Creamy Desserts: Master the Art of Silky, Indulgent Homemade Treats for additional inspiration.
Key Takeaways:
- ★Proper tempering prevents scrambling and ensures silky texture
- ★Heat milk to steaming but never boiling for best results
- ★Use quality vanilla extract and real cream for authentic flavor
- ★Strain pudding for completely smooth, professional texture
- ★Make ahead 1-2 days for optimal flavor development
Ready to create silky, indulgent creamy vanilla pudding? Gather your ingredients and follow this guide to create a dessert that rivals any restaurant. Share your homemade pudding with loved ones and watch their faces light up with delight!
Dessert making is both science and art. When you combine quality ingredients with proper technique and a touch of care, you create magic in your kitchen. Creamy vanilla pudding proves that the most elegant desserts often come from the simplest recipes executed with attention to detail and passion for flavor.